作者: whosb

  • ossim记录

    静下心来想想,感觉刚开始分析的方向就是错的,转而从ossim官方下载了手册通读了一遍,梳理了下日志处理流程。

    ossec-agent->ossec-server->写日志到/var/ossec/logs/alert/alerts.log->ossim-agent读取日志->匹配规则发送给ossim-server

    应该出在ossim-agent端匹配日志规则上,看了下ossec的插件/etc/ossim/agent/plugins/ossec.cfg,发现1111行

    [OSSEC – Windows Security audit – Logged on/off]应该就是匹配这个规则

    看了下regexp,和日志匹配是正确的,很奇怪,然后再看看日志web管理端,username和userdata1的值都能获取到,于是把

    src_ip改成$user,获取username,重启agent /etc/init.d/ossim-agent restart

    从新登陆系统产生一个事件,查看后居然src_ip还是0.0.0.0,费解了,难道不是匹配的这条规则?

    一想干脆粗暴点,打开ossec.cfg把所有src_ip都改成$user,重启agent,我靠,终于变了,肉流满面。然后逐个修改,最后定为到匹配的规则是[OSSEC -zzz- Generic Rule]

    regexp=”Alert.*\n(?P<date_header>\d+\s+\w+\s+\d+\s+\d+:\d+:\d+)\s(\((?P<agent_name>.*)\)\s)?(?P<agent_ip>.*)->.*\nRule:\s+(?P<sid>\d+).*\'(?P<msg>.*)\’\nSrc\sIP:\s(?P<sip>.*)\nUser:\s(?P<user>.*)\n(?P<data>.*)\n”src_ip={$sip}

    再看看ossec的日志

    ** Alert 1317615907.709569: – windows,authentication_success,

    2011 Oct 03 12:25:07 (10.135.15.201) 10.135.15.201->WinEvtLog

    Rule: 18107 (level 3) -> ‘Windows Logon Success.’

    Src IP: (none)

    User: Administrator

    WinEvtLog: Security: AUDIT_SUCCESS(528):

    居然是none。。然是none。。是none。。none。。。。。。。。

    还好[OSSEC -zzz- Generic Rule]能获取到agent_ip

    修改srp_ip={resolv($agent_ip)},重启agent,终于正常了
    src_ip改成$user,获取username,重启agent /etc/init.d/ossim-agent restart

    从新登陆系统产生一个事件,查看后居然src_ip还是0.0.0.0,费解了,难道不是匹配的这条规则?

    一想干脆粗暴点,打开ossec.cfg把所有src_ip都改成$user,重启agent,我靠,终于变了,肉流满面。然后逐个修改,最后定为到匹配的规则是[OSSEC -zzz- Generic Rule]

    regexp=”Alert.*\n(?P<date_header>\d+\s+\w+\s+\d+\s+\d+:\d+:\d+)\s(\((?P<agent_name>.*)\)\s)?(?P<agent_ip>.*)->.*\nRule:\s+(?P<sid>\d+).*\'(?P<msg>.*)\’\nSrc\sIP:\s(?P<sip>.*)\nUser:\s(?P<user>.*)\n(?P<data>.*)\n”src_ip={$sip}

    再看看ossec的日志

    ** Alert 1317615907.709569: – windows,authentication_success,

    2011 Oct 03 12:25:07 (10.135.15.201) 10.135.15.201->WinEvtLog

    Rule: 18107 (level 3) -> ‘Windows Logon Success.’

    Src IP: (none)

    User: Administrator

    WinEvtLog: Security: AUDIT_SUCCESS(528):

    居然是none。。然是none。。是none。。none。。。。。。。。

    还好[OSSEC -zzz- Generic Rule]能获取到agent_ip

    修改srp_ip={resolv($agent_ip)},重启agent,终于正常了
  • Ubuntu中命令行中文乱码解决方法

    首先…我说的命令行是指Ctrl+Alt+F1~F6开启的纯命令行模式 不是在X Window里打开的终端…

    如果你遇到的是终端里无法显示中文这篇文里的方法基本对你没用….可以跳过了~

    言归正传 纯命令行中中文无法显示

    解决方法1:学好英文..把环境变量设置为英文….(别抽我..)

    修改/etc/default/locale

    sudo vim /etc/default/locale1

    修改默认的
    LANG=zh_CN.UTF-8
    LANGUAGE=zh_CN:zh

    为:
    LANG=”en_US.UTF-8″
    LANGUAGE=”en_US:en”

    存盘退出

    然后:

    sudo reboot

    再然后

    env 或者 locale 查看修改后的结果 就可以了…

    解决方法2:这才是我想说的… 安装个zhcon就可以了…

    终端或者命令行里输入

    sudo apt-get install zhcon

    等安装完即可~

    运行的时候记得要加载vgz驱动和utf8支持 否则会黑屏…

    并且只能在纯命令行里运行 在终端运行会出错

    所以你的命令应该是zhcon –utf8 –drv=vga

    如果嫌每次都要输入这么多太麻烦可以在~/.bashrc里面加一个别名

    sudo vim ~/.bashrc

    打开后在里面加入一行

    alias zhcon=’zhcon –utf8 –drv=vga’
    保存退出

    这样每次进入命令行后直接运行zhcon即可 不用担心黑屏问题

    zhcon中支持中文显示也支持中文输入法 由于热键冲突问题暂时我只知道Ctrl+ space切换到全拼输入法是

    可以用的 多多少少解决了点中文目录/文件名的问题了

  • linux dhcp

    自己记录下,这么几个命令敲了无数遍还错,shit~~~

    /etc/sysconfig/network-scripts/ifcfg-eth0
    DEVICE=eth0
    ONBOOT=yes
    BOOTPROTO=dhcp
    或者使用netconfig配置动态地址
    然后运行# service network restart

  • centos6源及相关

    我想我是能看懂

    # CentOS-Base.repo
    #
    # mv /etc/yum.repos.d/CentOS-Base.repo/etc/yum.repos.d/CentOS-Base.repo.bak
    #yum makecache
    # This file uses a new mirrorlist system developed by Lance Davis for CentOS.
    # The mirror system uses the connecting IP address of the client and the
    # update status of each mirror to pick mirrors that are updated to and
    # geographically close to the client. You should use this for CentOS updates
    # unless you are manually picking other mirrors.
    #
    # If the mirrorlist= does not work for you, as a fall back you can try the
    # remarked out baseurl= line instead.
    #
    #

    [base]
    name=CentOS-$releasever – Base
    baseurl=http://mirrors.163.com/centos/6.0/os/$basearch/
    gpgcheck=1
    gpgkey=http://mirrors.163.com/centos/RPM-GPG-KEY-CentOS-6

    #released updates
    [updates]
    name=CentOS-$releasever – Updates
    baseurl=http://mirrors.163.com/centos/6.0/updates/$basearch/
    gpgcheck=1
    gpgkey=http://mirrors.163.com/centos/RPM-GPG-KEY-CentOS-6

    #packages used/produced in the build but not released
    #[addons]
    #name=CentOS-$releasever – Addons
    #baseurl=http://mirrors.163.com/centos/$releasever/addons/$basearch/
    #gpgcheck=1
    #gpgkey=http://mirrors.163.com/centos/RPM-GPG-KEY-CentOS-6
    #additional packages that may be useful
    [extras]
    name=CentOS-$releasever – Extras
    baseurl=http://mirrors.163.com/centos/6.0/extras/$basearch/
    gpgcheck=1
    gpgkey=http://mirrors.163.com/centos/RPM-GPG-KEY-CentOS-6
    #additional packages that extend functionality of existing packages
    [centosplus]
    name=CentOS-$releasever – Plus
    baseurl=http://mirrors.163.com/centos/6.0/centosplus/$basearch/
    gpgcheck=1
    enabled=0
    gpgkey=http://mirrors.163.com/centos/RPM-GPG-KEY-CentOS-6

  • nslookup的一些使用

    nslookup -d www.sohu.com dns.sohu.com

    nslookup -qt=ns www.sohu.com dns.sohu.com

    我能看懂就成了

  • centos换源

    以root用户进入CentOS系统。
    [root@xuxy ~]# cd /etc/yum.repos.d
    2.备份repo
    [root@xuxy yum.repos.d]# mv CentOS-Base.repo  CentOS-Base.repo.bak
    3.建立新的CentOS-Base.repo文件:(以CentOS 5.2为例)
    [root@xuxy yum.repos.d]#vi CentOS-Base.repo
    内容如下(以中国科技大学的yum源为例):
    # CentOS-Base.repo
    #
    # This file uses a new mirrorlist system developed by Lance Davis for CentOS.
    # The mirror system uses the connecting IP address of the client and the
    # update status of each mirror to pick mirrors that are updated to and
    # geographically close to the client.  You should use this for CentOS updates
    # unless you are manually picking other mirrors.
    #
    # If the mirrorlist= does not work for you, as a fall back you can try the
    # remarked out baseurl= line instead.
    #
    #
    
    [base]
    name=CentOS-$releasever - Base
    #mirrorlist=http://mirrorlist.centos.org/?release=$releasever&arch=$basearch&repo=os
    baseurl=http://centos.ustc.edu.cn/centos/$releasever/os/$basearch/
    gpgcheck=1
    gpgkey=http://centos.ustc.edu.cn/centos/RPM-GPG-KEY-CentOS-5
    
    #released updates
    [updates]
    name=CentOS-$releasever - Updates
    #mirrorlist=http://mirrorlist.centos.org/?release=$releasever&arch=$basearch&repo=updates
    baseurl=http://centos.ustc.edu.cn/centos/$releasever/updates/$basearch/
    gpgcheck=1
    gpgkey=http://centos.ustc.edu.cn/centos/RPM-GPG-KEY-CentOS-5
    
    #packages used/produced in the build but not released
    [addons]
    name=CentOS-$releasever - Addons
    #mirrorlist=http://mirrorlist.centos.org/?release=$releasever&arch=$basearch&repo=addons
    baseurl=http://centos.ustc.edu.cn/centos/$releasever/addons/$basearch/
    gpgcheck=1
    gpgkey=http://centos.ustc.edu.cn/centos/RPM-GPG-KEY-CentOS-5
    
    #additional packages that may be useful
    [extras]
    name=CentOS-$releasever - Extras
    #mirrorlist=http://mirrorlist.centos.org/?release=$releasever&arch=$basearch&repo=extras
    baseurl=http://centos.ustc.edu.cn/centos/$releasever/extras/$basearch/
    gpgcheck=1
    gpgkey=http://centos.ustc.edu.cn/centos/RPM-GPG-KEY-CentOS-5
    
    #additional packages that extend functionality of existing packages
    [centosplus]
    name=CentOS-$releasever - Plus
    #mirrorlist=http://mirrorlist.centos.org/?release=$releasever&arch=$basearch&repo=centosplus
    baseurl=http://centos.ustc.edu.cn/centos/$releasever/centosplus/$basearch/
    gpgcheck=1
    enabled=0
    gpgkey=http://centos.ustc.edu.cn/centos/RPM-GPG-KEY-CentOS-5


  • zabbix分布式监控1

    闲来无聊研究下分布式监控

    zabbix

    这个东东~·,听说效果不错,看看说明

    http://www.oschina.net/p/zabbix支持snmp管理,也支持自己的agent,

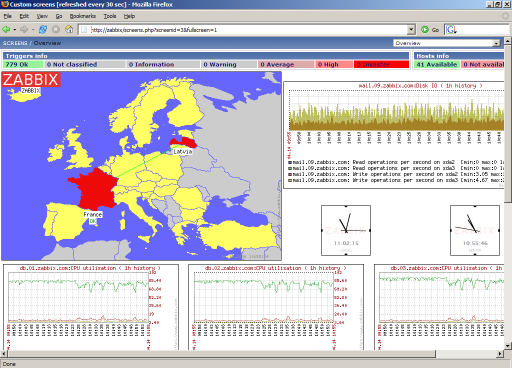
    长相是这样,大家先有个笼统的印象吧

    有个linux必须的我使用的是centos5.6手头有这个,折腾网弄了半天,最后dhclient好了,然后最好先yum upgrade好。悲催的,忘了改源了。

    yum install yum-fastestmirror -y

    希望看到这篇文章的人不要忘了这个。

    1.4和1.6的都有pdf手册,为啥1.8的就要在线看呢,悲剧的。

    http://www.zabbix.com/documentation.php

    NamePlatformCPU/MemoryDatabaseMonitored hosts
    SmallUbuntu LinuxPII 350MHz 256MBMySQL MyISAM20
    MediumUbuntu Linux 64 bitAMD Athlon 3200+ 2GBMySQL InnoDB500
    LargeUbuntu Linux 64 bitIntel Dual Core 6400 4GBRAID10 MySQL InnoDB or PostgreSQL>1000
    Very largeRedHat EnterpriseIntel Xeon 2xCPU 8GBFast RAID10 MySQL InnoDB or PostgreSQL>10000
  • Windows Installer 冗余文件清理

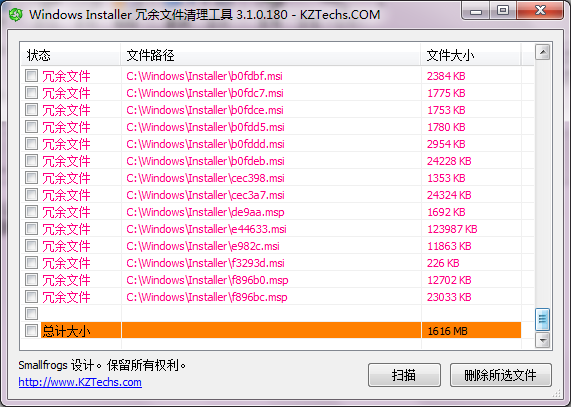
    什么叫做瞌睡遇枕头,今天晚上还在研究这个文件夹下的东西怎么清理呢,晚上就遇到了,先用用吧,效果么·~,以后再说了

    这个是原来的说明

    Windows Installer 是 M$ 在进行软件安装时常用的技术,技术挺好,就是每次安装完成后会在 %systemroot%\Installer\ 目录下备份一份安装程序,有时取消了安装,这些安装程序依然存在,时间一长,这个目录就非常巨大了,而 wicleanup 正是一款用来清理冗余安装文件的工具,并且拥有傻瓜式的操作。

  • 再次尝试进行双wp同步

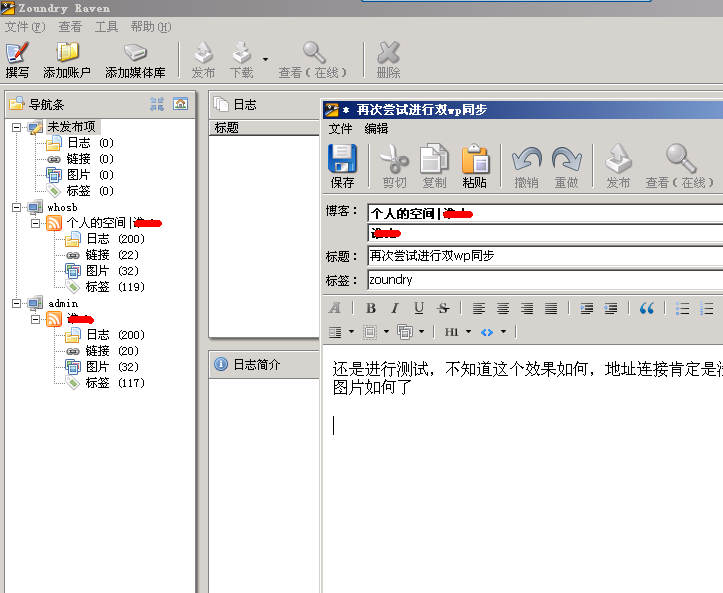
    还是进行测试,不知道这个效果如何,地址连接肯定是没办法都同步过去了,不知道图片如何了

    zoundry.png