分类: mo

  • ntopng 安装

    网上以讹传讹的太多

    参考

    http://www.ntop.org/ntop/mini-tutorial-fresh-install-of-ntopng-on-centos-7/

    yum install -y subversion autoconf automake make gcc libpcap-devel libxml2-devel sqlite-devel libtool glib2-devel gcc-c++ libcurl-devel.x86_64 redis

    git clone https://github.com/ntop/ntopng.git
    git clone https://github.com/ntop/nDPI.git

    cd ntopng

    $ ./autogen.sh
    $ ./configure
    $ make

    service redis start

    ntopng -i eth1 –local-networks “1.100.0.0/8,192.168.0.0/16”

    其中eth1 是你的镜像数据口  后面是local-network,有更高要求的自己看help吧,这个只是说一下简单安装

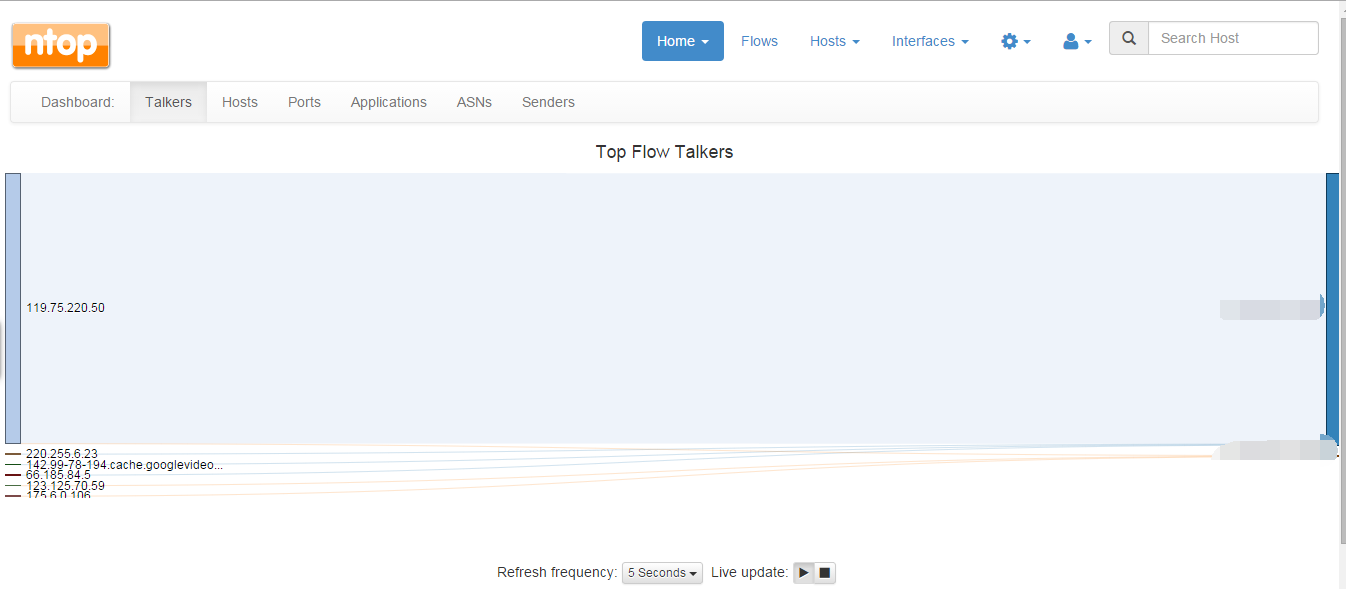
    然后打开你http://ip:3000  用户密码 admin

    ntopng cli

    update:2016年12月28日14:57:31
    一直在发现会提示一个ntop的认证还觉得见鬼了呢,完全没有添加官方的资源,经过仔细检查,添加了链接,wp会自动引用预览,真是坑的没谁了,改掉就好了

  • chengd-ossim

    chengd-ossim

    http://lymrg.blog.51cto.com/1551327/385386
    log文件
    /var/log/localmessage

    plugin文件
    /etc/ossim/agent/plugins/zabbix.cfg

    /etc/ossim/agent/config.cfg

    [zabbix]

    zabbix=/etc/ossim/agent/plugins/zabbix.cfg

    www
    /usr/share/www/ossim/

    数据库 ossim 的plugin表 创建
    zabbix
    INSERT INTO `ossim`.`plugin` (

    `id` ,
    `type` ,
    `name` ,
    `description` ,
    `source_type` ,
    `vendor`

    )
    VALUES (

    ‘4500’, ‘1’, ‘zabbix’, ‘zabbix server message’, NULL , NULL

    );

    在plugin-sid里面添加
    INSERT INTO `ossim`.`plugin_sid` (`plugin_id`, `sid`, `category_id`, `class_id`, `reliability`, `priority`, `name`, `aro`, `subcategory_id`) VALUES (‘4500’, ‘1’, NULL, NULL, ‘5’, ‘5’, ‘zabbix warm’, ‘0.0000’, NULL);
  • zabbix install

    zabbix install

    dohttp://blog.csdn.net/lx_9986/article/details/6763163
    download
    wget http://prdownloads.sourceforge.net/zabbix/zabbix-1.8.9.tar.gz?download
    iptables -F
    yum install httpd.x86_64  httpd-manual.x86_64
    启动Apache:
    apachectl start
    启动会有一定情况提示
    Could not reliably determine the server’s fully qualified domain name, using localhost.localdomain for ServerName
    /etc/httpd/conf/httpd.conf 中設定 ServerName
    将 Apache 设置为开机自动启动
    chkconfig –add httpd
    chkconfig –level 345 httpd on
    nano /etc/httpd/conf/httpd.conf
    yum install php.i686 php-bcmath.i686 php-gd.i686 php-mbstring  php-xml
    yum install mysql-server.i686 mysql.i686 php-mysql.i686
    启动 MySQL
    service mysqld start
    设置 MySQL root 密码
    mysqladmin -uroot -p password 123456
    Enter password: 输入旧密码(如果是第一次设置,root 默认密码为空,直接回车)
    设置MySQL开机自动启动
    chkconfig –add mysqld
    chkconfig –level 345 mysqld on
    yum install mysql-devel.i686
    yum install net-snmp.i686 net-snmp-devel.i686 net-snmp-utils.i686
    yum install curl.i686 curl-devel
    yum install gcc.i686 libgcc.i386 libgcc.i686
    yum install make wget nano
    下载安装
    ./configure –enable-server –enable-agent –with-mysql –with-net-snmp –with-libcurlll
    ./configure –enable-server  –enable-agent –with-mysql –with-net-snmp   –with-libcurl –prefix=/usr/local/zabbix
    make install
    useradd -d /home/zabbix -p zabbix zabbix
    创建 zabbix 用户
    进入 zabbix 解压缩后的目录,创建 zabbix 数据库
    mysql -uroot -p123456
    create database zabbix;
    quit;
    cat create/schema/mysql.sql | mysql -uroot -p123456 zabbix
    cat create/data/data.sql | mysql -uroot -p123456 zabbix
    cat create/data/images_mysql.sql | mysql -uroot -p123456 zabbix
    修改 /etc/services,加入以下行
    echo “zabbix-agent    10050/tcp  Zabbix Agent” >>/etc/services
    echo “zabbix-agent    10050/udp  Zabbix Agent” >>/etc/services
    echo “zabbix-trapper  10051/tcp  Zabbix Trapper” >>/etc/services
    echo “zabbix-trapper  10051/udp  Zabbix Trapper ” >>/etc/services
    修改 zabbix 的配置文件
    创建配置文件目录,并将源代码中的配置文件模板拷贝到新创建的配置文件目录中。
    mkdir /etc/zabbix
    cp misc/conf/* /etc/zabbix
    根据实际情况修改 zabbix_server.conf  zabbix_agentd.conf zabbix_agent zabbix_trapper.conf  一般都取默认值,除了
    改agentd的ip地址
    mysql 的数据库用户名和密码,如:
    DBUser=root
    DBPassword=123456
    拷贝zabbix服务器的frontend php 程序到 http server 的主目录下
    cp -r frontends/php/* /var/www/html
    修改php参数
    /etc/php.ini
    date.timezone =Asia/Chongqing
    post_max_size = 32M
    max_execution_time = 600
    max_input_time = 600
    /etc/httpd/conf/httpd.conf
    AddType application/x-httpd-php .php
    AddType application/x-httpd-php-source .phps
    chkconfig –level 35 iptables off
    给权限
    setenforce 0
    service httpd restart
    cp /root/zabbix-1.8.10/misc/init.d/redhat/8.0/zabb* /etc/init.d/
    修改  zabbix  agentd 和server
    /usr/local/zabbix/bin/zabbix_agentd改为实际的,centos中为sbin
    /usr/local/zabbix/sbin/zabbix_agentd
    runlevel
    /etc/rc3.d/xxx
    可能apache 不解析php重启
    ——————————————————————————————————————————————————————
    download
    php
    wget http://www.php.net/get/php-5.3.8.tar.gz
    phpmyadmin
    wget http://sourceforge.net/projects/phpmyadmin/files%2FphpMyAdmin%2F3.4.9%2FphpMyAdmin-3.4.9-all-languages.tar.gz
  • zabbix-mail

    zabbix  邮件 时间

    配置,安装 邮件 输出 log

    cp /usr/share/zoneinfo/Asia/Shanghai /etc/localtime
    ntpdate us.pool.ntp.org

     zabbix系统的时区只与/etc/localtime有关。如果用/usr/share/zoneinfo/下面的某个时区文件(比如我用的Aisa/Shanghai)覆盖/etc/localtime,那么zabbix的系统时区就是相应的localtime(我的就是CST了)。如果不覆盖/etc/localtime,则zabbix就是采用UTC时间。这个可以通过敲入date命令看出来。

    (网上也查了很多资料,关于linux系统时区的设置。比较多的是说与/etc/sysconfig/clock文件里的“UTC=true、false”有关。但zabbix的clock文件里边没有“UTC=true、false”,而且自己给加上这么一行也没用。而且与clock文件里的hwclock=–localtime无关系。即便=–localtime,如果不覆盖/etc/localtime,用date命令显示的仍是UTC。)


    zypper install ncurses-devel gcc make

    wget ftp://ftp.mutt.org/mutt/mutt-1.4.2.3.tar.gz

    tar zxvf mutt-1.4.2.3.tar.gz

    ./configure –prefix=/usr/local/msmtp

    make

    make install


    Muttrc

    /usr/local/msmtp/etc/Muttrc


    set sendmail=”/usr/local/msmtp/bin/mutt”


    正常的发送邮件应该是

    ./usr/local/msmtp/bin/mutt [email protected]

    fin

    配置文件在

    /usr/local/msmtp/etc/Muttrc


    配置文件为止

    /usr/local/msmtp/etc/Muttrc


    echo “neirong” |./mutt -s “tt” [email protected]

  • mutt

    mutt

    先msmtp
    yum 安装时候的配置文件
    nano /usr/local/etc/Muttrc
    echo $3 |mutt -s $2 $1
  • zabbix fping

    zabbix fping

    shell> chown root:zabbix /usr/sbin/fping
    shell> chmod 710 /usr/sbin/fping
    shell> chmod ug+s /usr/sbin/fping
    CentOS 5centos.karan.org/el5/extras/testing/x86_64/RPMS/fping-2.4b2-7.el5.kb.x86_64.rpm
    CentOS 5centos.karan.org/el5/extras/testing/i386/RPMS/fping-2.4b2-7.el5.kb.i386.rpm
    Checks if server is accessible by ICMP ping. 0 – ICMP ping fails. 1 – ICMP ping successful. One of zabbix_server processes performs ICMP pings once per PingerFrequency seconds
    zabbix fping

    web03# wget http://fping.sourceforge.net/download/fping.tar.gz
    web03# tar zxf fping.tar.gz
    web03# cd fping-2.4b2_to
    web03# ./configure
    web03# make && make install

    安装完毕后,一起就2个文件:

    /usr/local/sbin/fping #执行文件
    
    /usr/local/man/man8/fping.8 #man文件

    设置fping权限:

    web03# chown root:zabbix /usr/local/sbin/fping
    web03# chmod 710 /usr/local/sbin/fping
    web03# chmod ug+s /usr/local/sbin/fping
  • zabbix_get

    zabbix_get

    zabbix_get -s 172.16.188.50 -p10050 -k”cpu[*]”

    这个是测试的命令

    UserParameter=key[*],command
    这个是格式

    UserParameter=httpd[cpu],ps auxw|grep httpd|grep -v grep| awk ‘{s+=$3} END {print s}’

    这个是我们测试CPU的条目当然了,没成功

    UserParameter=httpd[cpu],ps auxw|grep httpd|grep -v grep| awk ‘{s+=$3} END {print s}’//放在zabbix_agent.conf里面

  • zabbix ossim 协同

    zabbix ossim 协同

    修改syslog脚本发送出去
    /etc/rsyslog.conf

    local0,local1.*    @@10.1.5.124:514
    发送到124

    修改报警脚本

    /home/zabbix/bin/baojing

    #!/bin/bash
    logger -p local1.1 “$2 $3”

  • ossim记录

    静下心来想想,感觉刚开始分析的方向就是错的,转而从ossim官方下载了手册通读了一遍,梳理了下日志处理流程。

    ossec-agent->ossec-server->写日志到/var/ossec/logs/alert/alerts.log->ossim-agent读取日志->匹配规则发送给ossim-server

    应该出在ossim-agent端匹配日志规则上,看了下ossec的插件/etc/ossim/agent/plugins/ossec.cfg,发现1111行

    [OSSEC – Windows Security audit – Logged on/off]应该就是匹配这个规则

    看了下regexp,和日志匹配是正确的,很奇怪,然后再看看日志web管理端,username和userdata1的值都能获取到,于是把

    src_ip改成$user,获取username,重启agent /etc/init.d/ossim-agent restart

    从新登陆系统产生一个事件,查看后居然src_ip还是0.0.0.0,费解了,难道不是匹配的这条规则?

    一想干脆粗暴点,打开ossec.cfg把所有src_ip都改成$user,重启agent,我靠,终于变了,肉流满面。然后逐个修改,最后定为到匹配的规则是[OSSEC -zzz- Generic Rule]

    regexp=”Alert.*\n(?P<date_header>\d+\s+\w+\s+\d+\s+\d+:\d+:\d+)\s(\((?P<agent_name>.*)\)\s)?(?P<agent_ip>.*)->.*\nRule:\s+(?P<sid>\d+).*\'(?P<msg>.*)\’\nSrc\sIP:\s(?P<sip>.*)\nUser:\s(?P<user>.*)\n(?P<data>.*)\n”src_ip={$sip}

    再看看ossec的日志

    ** Alert 1317615907.709569: – windows,authentication_success,

    2011 Oct 03 12:25:07 (10.135.15.201) 10.135.15.201->WinEvtLog

    Rule: 18107 (level 3) -> ‘Windows Logon Success.’

    Src IP: (none)

    User: Administrator

    WinEvtLog: Security: AUDIT_SUCCESS(528):

    居然是none。。然是none。。是none。。none。。。。。。。。

    还好[OSSEC -zzz- Generic Rule]能获取到agent_ip

    修改srp_ip={resolv($agent_ip)},重启agent,终于正常了

    src_ip改成$user,获取username,重启agent /etc/init.d/ossim-agent restart

    从新登陆系统产生一个事件,查看后居然src_ip还是0.0.0.0,费解了,难道不是匹配的这条规则?

    一想干脆粗暴点,打开ossec.cfg把所有src_ip都改成$user,重启agent,我靠,终于变了,肉流满面。然后逐个修改,最后定为到匹配的规则是[OSSEC -zzz- Generic Rule]

    regexp=”Alert.*\n(?P<date_header>\d+\s+\w+\s+\d+\s+\d+:\d+:\d+)\s(\((?P<agent_name>.*)\)\s)?(?P<agent_ip>.*)->.*\nRule:\s+(?P<sid>\d+).*\'(?P<msg>.*)\’\nSrc\sIP:\s(?P<sip>.*)\nUser:\s(?P<user>.*)\n(?P<data>.*)\n”src_ip={$sip}

    再看看ossec的日志

    ** Alert 1317615907.709569: – windows,authentication_success,

    2011 Oct 03 12:25:07 (10.135.15.201) 10.135.15.201->WinEvtLog

    Rule: 18107 (level 3) -> ‘Windows Logon Success.’

    Src IP: (none)

    User: Administrator

    WinEvtLog: Security: AUDIT_SUCCESS(528):

    居然是none。。然是none。。是none。。none。。。。。。。。

    还好[OSSEC -zzz- Generic Rule]能获取到agent_ip

    修改srp_ip={resolv($agent_ip)},重启agent,终于正常了